The Zoom H1 is great because it is small and versatile, but have you ever mounted one on top of your camera? Gross. The cacophony of handling noise is insufferable… Something had to be done. I had a look at existing Shock Mount options for the H1 but none of them satisfied my requirements, they were either too big, too fragile, or - honestly - too ugly.
I decided to take matters into my own hands, and set about designing a compact 3D printable shock mount for the Zoom H1. The mount I came up with works surprisingly well, so I'm giving the file away to anyone who wants to have their own printed for their H1 or any other microphone that might happen to fit.
Check out the video above to see the design process, how the mount works, and A/B tests. Keep reading to find out how you can get the file and print one for yourself.
How Does It Work?
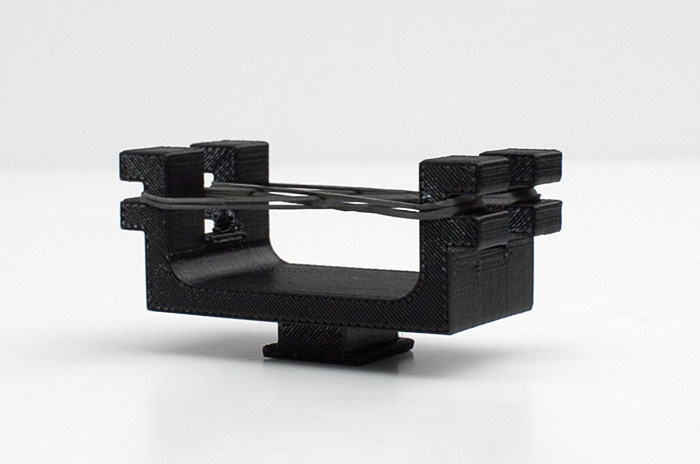
Like many other shock mounts, my mount uses elastic bands to suspend the H1 in space and insulate it from vibrations that would otherwise travel through the camera body, up the mount, and into the body of the H1.
Basically, the shock mount fits comfortably into the hot shoe on top of your camera. The mount features four arms to wrap elastic bands around. These bands form a cradle for the microphone which you then place on top of these bands. Finally you seal the microphone into the mount with two more elastic bands. You can see a step by step version of this process in the video above.
On Elastic Bands.
If you're keen to use this shock mount you'll have to provide your own elastic bands, the good news is that it works with all kinds of bands. I'm sure that performance varies depending on the bands used. Unfortunately the world of elastic bands is varied and unregulated (read: I'm not an elastic band expert), so you'll have to conduct a few experiments of your own to determine your band's sweet spot for secure mounting and handling noise dampening. From my experiments I can tell you this: Hair ties don't work - So don't bother with them.
Design Improvements?
I designed this thing on a pretty tight deadline as I'm just about to dash off overseas for the ultimate field test. There are a couple of obvious ways that the design could be improved... A locking ring for the hot shoe would be good, as well as as a standard thread for mounting the mic on a tripod, camera cage, boom pole, or stand.

Print Your Own!
So you want to print your own? Great! Before I give you the file, there's a couple of things you should know.
- I give you the file in good faith, with the hope that it will improve your filmmaking experience. Consider the design to be in BETA. 3D printing is a relatively new field, and I'm new to designing for it. Your print may be of a different quality to mine. I take no responsibility for the success or quality of your 3D print, the quality of the sound or footage that you create whilst using this mount, or any damage to equipment that occurs whilst using/as a result of using this mount. You are an intelligent person, you can tell when this is or isn't the right thing to be using.
- This file and its contents are released under the Creative Commons Attribution-NonCommercial-ShareAlike 4.0 International License (CC BY-NC-SA 4.0). So if you're thinking of altering, or sharing or doing anything else with the design, read the license first to see what is and isn't allowed.
Free Download!

Shock Mount by Max Piantoni is licensed under a Creative Commons Attribution-NonCommercial-ShareAlike 4.0 International License.
The .zip file includes a .STL file containing the shock mount design for 3D printing and a text file containing information about the file and its license.
The design is absolutely free to download, just hit the link below.
Donate?
As I mentioned, the design is absolutely free to download. However if you enjoy it, consider making a small donation. I accept donations through Paypal, and anything I receive allows me to continue experimenting and making cool things like this.
Feedback
I'd love to hear about your experiences using the shock mount. Contact me with any feedback, comments or experiences you may have.
More To Explore
If you find this interesting or useful you should follow me on twitter for more useful and interesting things: @maxpiantoni
You might also like to check out my short film South By Scooter, or another camera hack I put together: Shoot Beautiful DSLR Fisheye With A Hacked Lomo Fisheye II Lens.
